Hi
With June '20 update, a new set of 5 challenges were added to the base game. Created this topic to help out anyone who might struggle with Numbing Expert challenge.
In Numbing Expert challenge you need to disable certain class and amount of machines with EMP, excluding ticks, with following requirements:
- Disable 10 prototype machines
- Disable 15 military machines
- Disable 20 FNIX machines using only battery packs
- Disable 30 apocalypse machines using only battery packs
Overall tips
This challenge requires quite a lot of sneaking since you need to disable machines without being detected first. At the time of writing this guide, PC players will have it easier since they have Prone to use for best sneaking (lowest detection range), while console players get Prone in July '20 update.
A weapon with a silencer helps in this challenge since when you fire unsilenced shot to blow e.g car battery, machines can hear your shot and detect you before EMP effect kicks in.
As long as there is no proximity arrow or the proximity arrow is white, you are good. But as soon as proximity arrow turns yellow or red, even after you’ve deployed your EMP but before machine shuts down, the challenge doesn’t count.
Also, if you have been made and machines start shooting at you and you run away far enough to escape combat in hopes to return to same machine(s) to EMP them again, do note that when you EMP the same machine(s) after it has detected you or fired at you, the challenge doesn’t count.
Once you’ve EMPd the machine(s) and if you stick around, they come out of EMP and start shooting at you. You don’t have to stick around to engage them, instead, you can fast travel out of there after EMP is blown.
EMPs in the game:
- car battery
- EMP rocket (need m/49 to fire)
- environmental EMPs (electrical boxes when shot at)
- relay beacons
When you snipe the relay beacon from far distance with 1 shot (guide here), it will discharge EMP, shutting down all machines around it. I didn’t test relay beacons in my game since i didn’t have any to shoot at. - small battery pack
- medium battery pack
- large battery pack
Tips for each tier
Tier 1 is easiest since you need to disable only 10 prototype machines, regardless if it’s seeker, runner, hunter or tank. Also, prototype machines have the worst sensors in game, making them easy to sneak upon.
Below is my gameplay of disabling prototype hunter, who happened to be a rival as well, to get Tier 1 completed:
My tactics were:
- Sneak to the hunter from behind so it won’t see me.
- Place the EMP (at that time, i only had large battery pack but car battery does the job too).
- Shoot the EMP with silenced weapon, so hunter doesn’t hear my gunshot.
- Fast travel out of there, so that i don’t have to engage it.
Tier 2 is same as Tier 1 in terms of available EMPs you can use. With only difference of you now needing to disable military machines and 15 of them.
Here, i tested with EMP rockets since they give a good range and wide area of effect. For some reason, i wasn’t able to detonate EMP rockets at 100m and more distance. The rocket just passed through the machine without going off at all. It could be isolated issue (e.g only i have it) or something more serious (everyone has it). At close range (50m and less), EMP rocket does work, disabling machines and counting towards challenge if you weren’t detected beforehand.
Tier 3 will get considerably harder compared to the first two. Not only you have to disable FNIX machines and 20 of them, but you can only use battery packs.
I’ll explain what those are, where to get them and how to use them.
In the game, we have three battery packs (cells): small, medium and large;
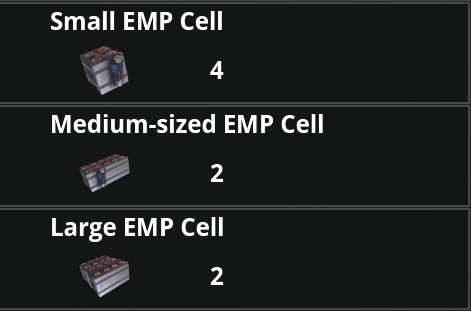
- Small battery pack
You’ll get them from destroyed seekers and runners (regardless the class). And if you have Mechanic skill (preferably level 2), you’ll increase your chances of finding them from machine’s loot table. However, if you don’t have Mechanic skill, look for pre-disabled machines lying on the ground, with sparks popping out of them. There are plenty of disabled runners and few seekers in Archipelago, South Coast and SE of Airfield where to loot small battery packs.
They work just like grenades. You prime them and throw them, with they blowing up by themselves.
Small battery packs are enough to disable runners and seekers. Though, seekers may hear you throwing the battery pack before it blows up. In my game, military seekers detected me twice before small battery pack exploded and disabled them. - Medium battery pack
You’ll get them from destroyed hunters (regardless the class). Again, Mechanic skill helps your chances of finding one. There are also few pre-disabled hunters in the game where to loot them without having Mechanic skill.
Just like small ones, medium ones also work like grenades. Just prime and throw them.
Medium battery packs are more powerful and enough to disable hunters as well, or several runners. - Large battery pack
You’ll get them from harvesters and tanks. Again, Mechanic skill helps finding them. Though, there are no pre-disabled harvesters or tanks in the game, where to loot those.
These are place-ables and you need to shoot it for it to go off, just like Car Battery.
Large battery packs are the most powerful EMP in the game and enough to disable any machine, including harvesters and tanks. Their area of effect is also large and can disable several machines at once.
Below is my gameplay of disabling several FNIX hunters, to progress Tier 3:
My tactics were:
- Place Large battery pack.
- Place Heavy comm array lure to bring machines to the battery pack.
- Shoot the battery back with silenced weapon (AG4).
With it, i got 7 FNIX machines disabled at once, considerably advancing my Tier 3.
Currently, i have Tier 3 at 10/20 and it’s still in progress.
Tier 4 is same as Tier 3 above with small difference of needing to disable only apocalypse machines and 30 of them. Again, you can use only battery packs.
Best place where to do 4th tier would be Himfjäll since it crawls with apocalypse machines but you’d need Alpine Unrest DLC for that. Without the DLC, apocalypse machines do spawn in Southern part of South Coast, NE part of North Coast, West part of Marshlands and around Marden bunker in Forest region.
For tactics: you can lob small battery packs at runners, medium battery packs at hunters or group of runners and large battery pack + (heavy) comm array lure combo works great for disabling several machines at once.
And this concludes Numbing Expert challenge guide.
–
Aesyle
 Until now the greatest challenge for me is to find those machines I need. It seems that when you need them I only see military and fnix, but prototype is in hiding. I bet it’s the other way around if I need fnix machines.